Connecting pfSense to an OpenVPN Access Server
This guide will be a step by step walk through of how to get a pfSense® client connecting to OpenVPN AS (Access Server). The .ovpn file it generates is a bit odd so we will walk through how to extract the parts needed and where to put them into the pfSense software.
The guide will mainly focus on the pfSense router side of it, but will touch on some basics of installing OpenVPN AS package.
OpenVPN AS vs Community OpenVPN
OpenVPN AS is the commercial version, that can be deployed via package on multiple Linux Distro’s, Virtual Appliance or Cloud services like Amazon.
It comes with 2 licenses, so this makes handy for personal use be it simple package install on a low-end vps or deployed directly on a VPS AS appliance.
Why pay for a VPN connection, when a low-end VPS in pretty much any part of the world can be obtained for a year for quite often the cost of some VPN providers monthly fee.
Getting and installing AS
Packages for favorite Linux Distros can be gotten here: https://openvpn.net/index.php/access-server/download-openvpn-as-sw.html
SSH to a VPS
In this example its a low end 128MB with Ubuntu 14.04 32bit. Make sure it has tun/tap VPN support - not all VPS types have this.
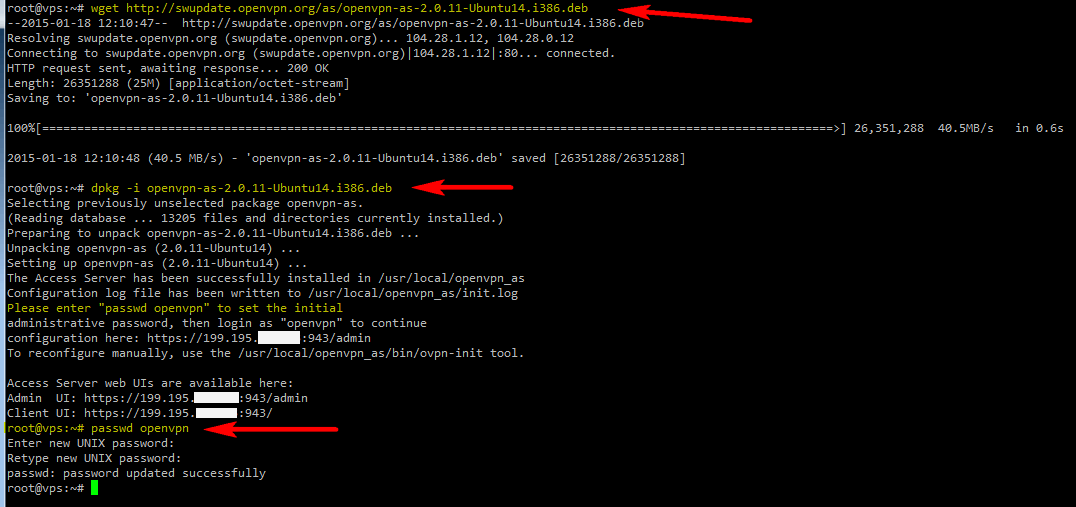
As you can see here.. Logged in as root, use wget to grab the package, install the package with dpkg and then set the password on the OpenVPN account it creates.

Go to the OpenVPN URL it lists
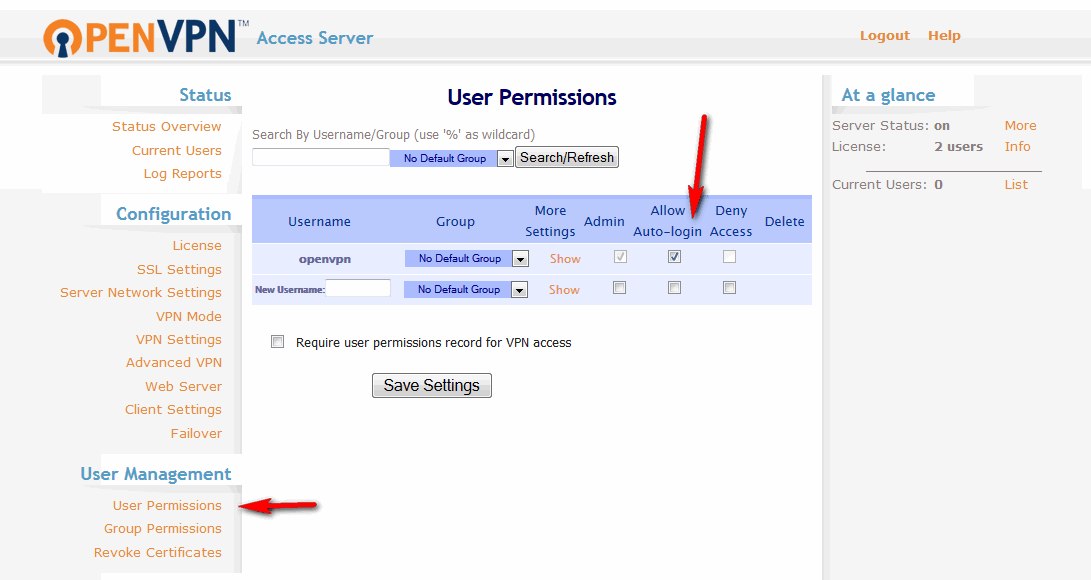
First go to the admin URL it provides - we are going set the profile to autologin and then grab the .ovpn file to extra info to put in to pfSense router. You can validate that the VPN works with either a normal OpenVPN client or the connect client that is available to download when you hit the given URL and login for admin.
Login with the OpenVPN account with the changed password, then set permissions on the account to autologin. Make sure to save that and then it will ask to update the running server - click OK.

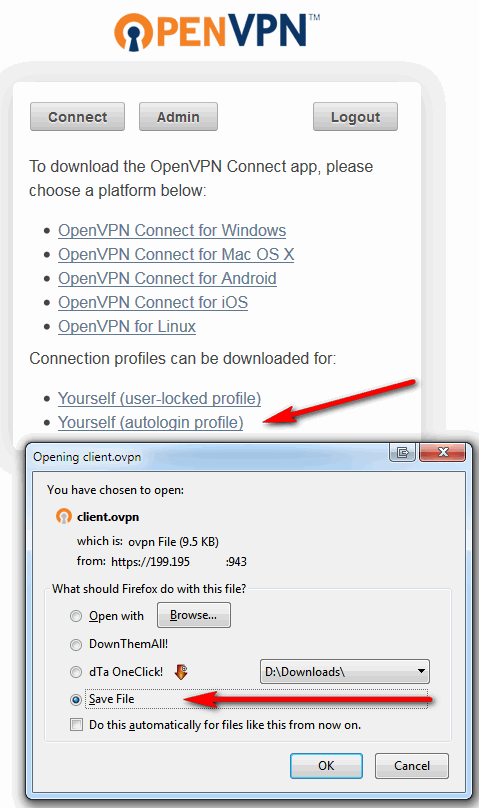
Logout and go back to the main non-admin URL and login again and you will see the autologin profile to download

This is a good time to validate it is working by using that .ovpn configuration on a machine running the OpenVPN client or use the connect client downloaded at the same URL.
It is now possible to connect and go to a site that reports the client IP address, such as http://checkip.dyndns.org/, which should show the IP address of the VPN server to confirm that the client traffic is using the VPN. Once that is working, the pfSense router may be configured to use the info in the .ovpn file
Credits
Thanks to this great post https://forum.netgate.com/post/67545