Virtualizing pfSense with Proxmox
This following article is about building and running a pfSense® virtual machine under Proxmox 4.4. The guide applies to any newer Proxmox version. Article covers Proxmox networking setup and pfSense virtual machine setup process. The guide does not cover how to install Proxmox. A basic, working, pfSense virtual machine will exist by the end of this article.
Assumptions
Proxmox host is up and running
Host has at least two network interfaces available for WAN and LAN.
you have already upload pfSense image to the host
Basic Proxmox networking
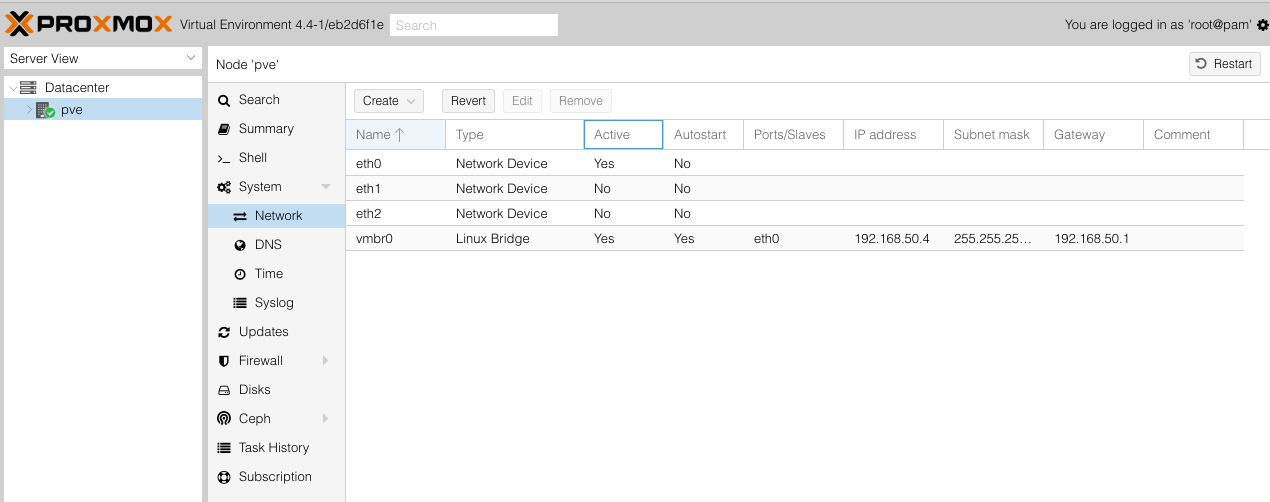
In order to virtualize pfSense software, first create two Linux Bridges on Proxmox, which will be used for LAN and WAN. Select your host from the server view, navigate to System > Network. We will be using eth1 and eth2 interfaces for the pfSense firewall, while eth0 is for Proxmox management.
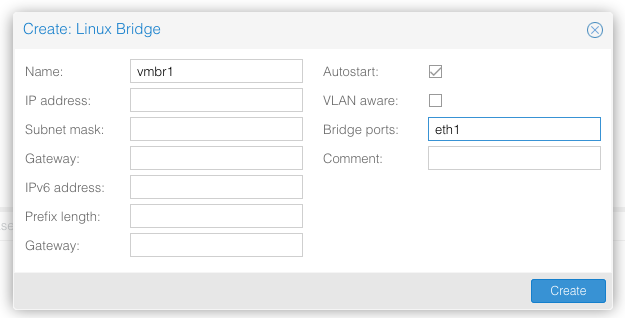
Click on create and select Linux Bridge. Under Bridge ports enter eth1.
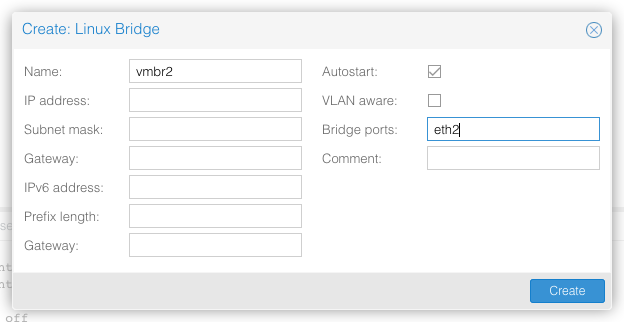
Repeat the process to add another Linux Bridge, this time add eth2 under Bridge ports.
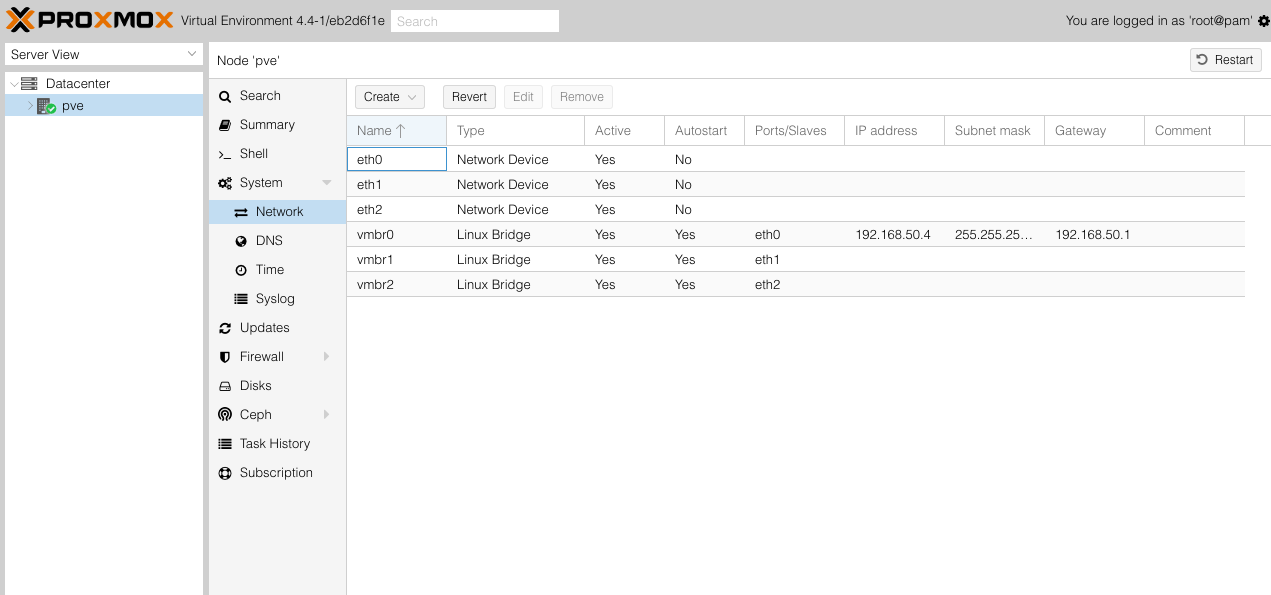
Proxmox Networking should now display two Linux bridges like on the following screenshot. WARNING: Proxmox requires reboot if the interfaces are not marked Active.
Creating pfSense virtual machine
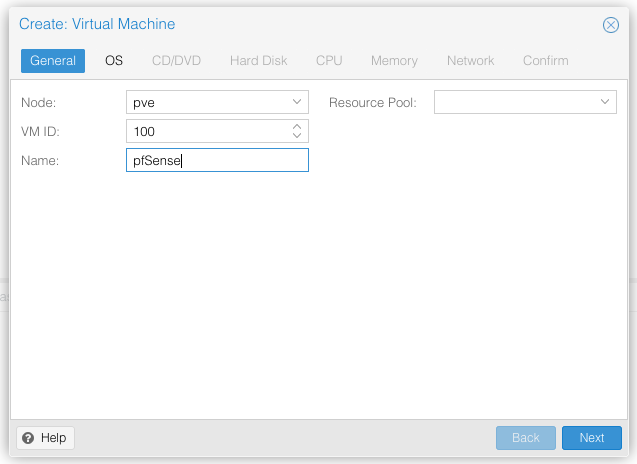
After creating WAN and LAN Linux bridges, now we proceed to create a new virtual machine. Click on Create VM from the top right section and new virtual machine wizard will appear. Under General tab, add a name to your pfSense VM.
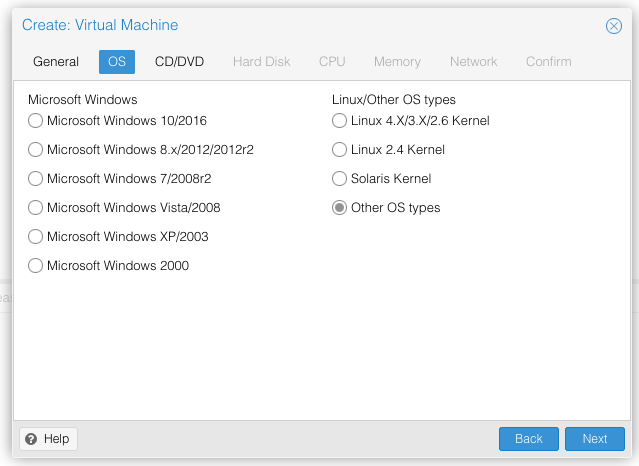
Under OS tab select Other OS types and click next.
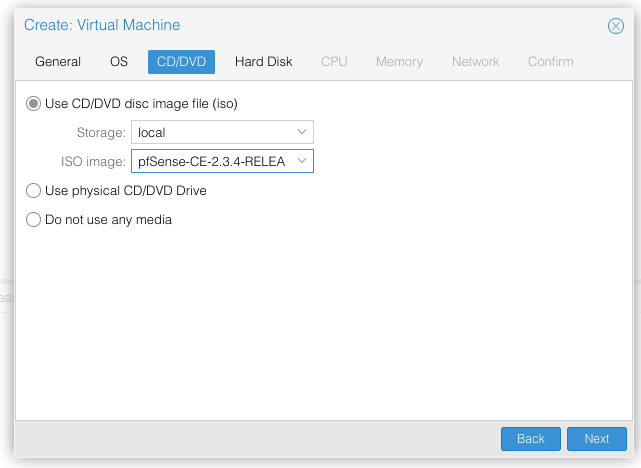
On CD/DVD tab select local storage and under ISO image find the previously uploaded pfSense ISO.
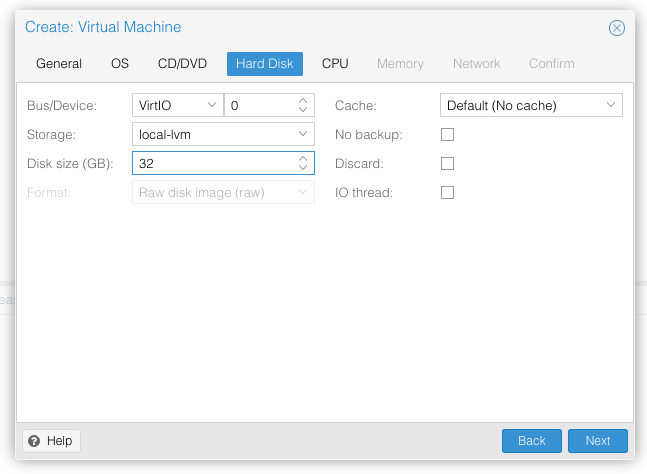
On the next tab, select VirtIO under Bus/Device and enter disk size you need.
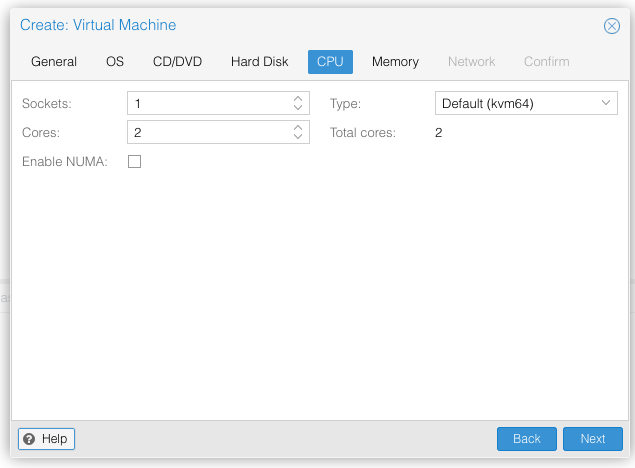
On the CPU tab select a single socket and add one or more cores. Confirm CPU type is Default (kvm64).
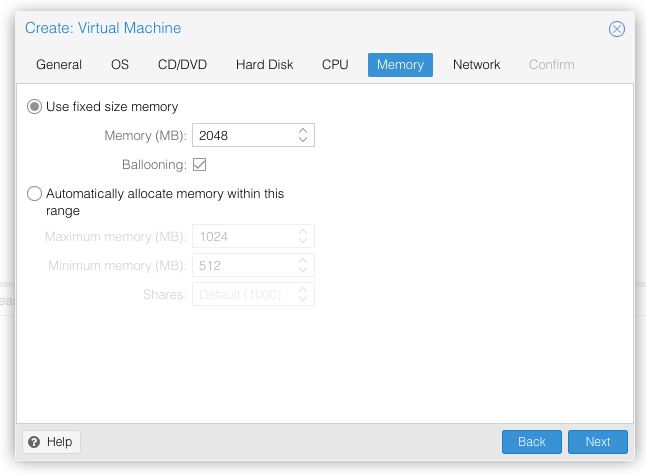
Under Memory tab add at least 1024 MB. Use fixed size memory.
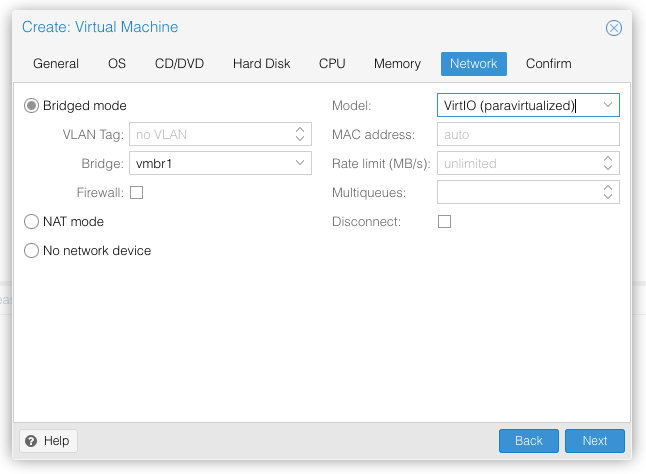
On the Network tab select Bridged mode and vmbr1. Make sure VirtIO (paravirtualized) is selected under Model.
Finally confirm the settings and wait for the VM to be created. Select your newly created virtual machine from the server view sidebar.

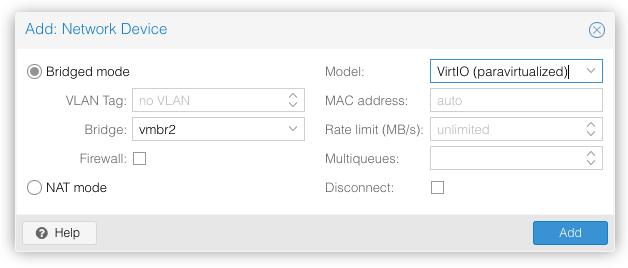
While the pfSense virtual machine is selected, click on Hardware settings and add another network device. Under Bridge enter vmbr2 and select VirtIO (paravirtualized) under Model.
Confirm your virtual machine has two network interfaces now.

Starting and configuring the pfSense virtual machine
After creating a new virtual machine and adding network interfaces, it’s time to start the virtual machine. If everything was done correctly, you can see pfSense software booting up from the Console window.
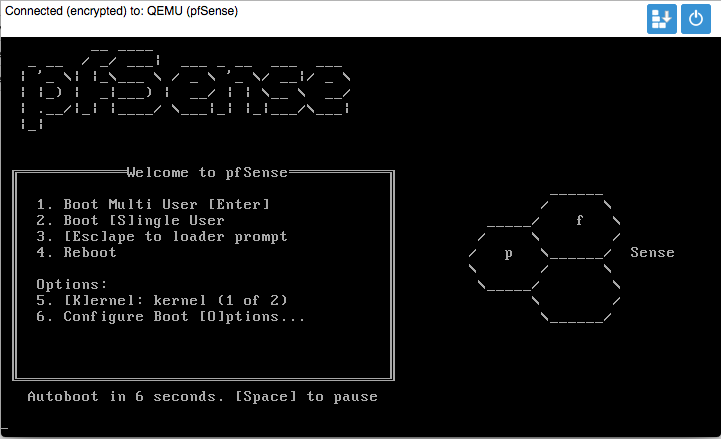
The pfSense installer will prompt you to select boot mode, press I to launch the installer.
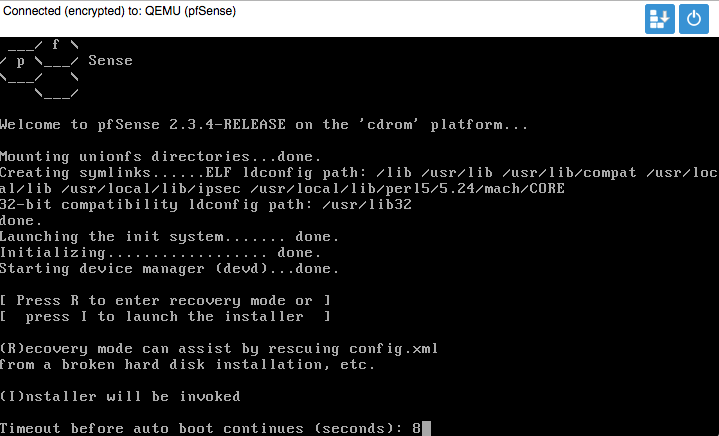
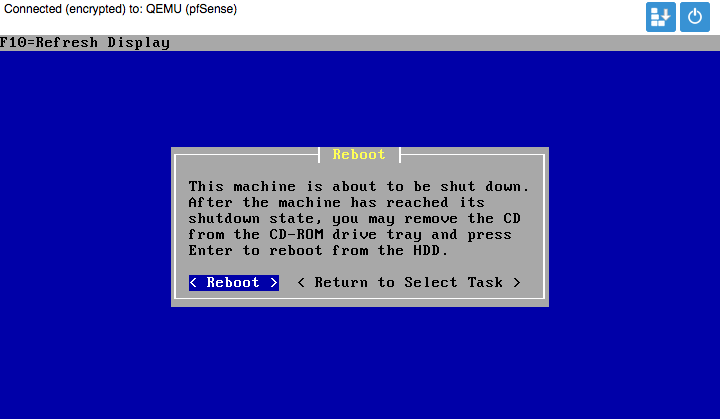
When pfSense setup boots up, follow the installation steps as you would on a physical device. Simply run Quick/Easy setup and wait for it to complete. When prompted, select standard kernel. Click reboot to complete the installation. Make sure you remove the .ISO from the virtual CD/DVD media.
After pfSense virtual machine reboots you will be greeted by interfaces assignment wizard. We will not set be setting up VLAN’s now, so press N and confirm
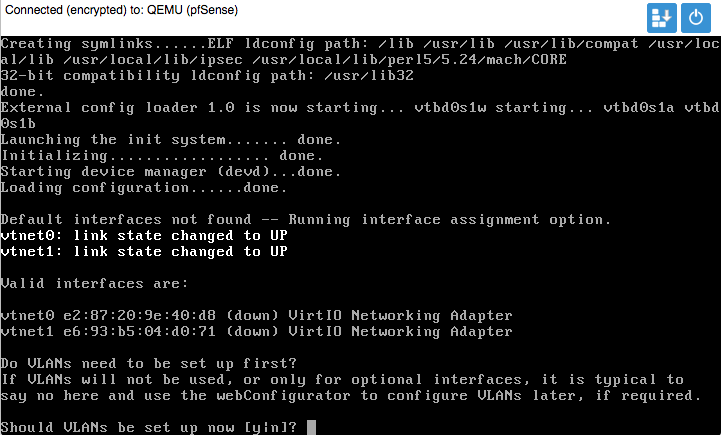
On the following steps assign the WAN and LAN interfaces. For the purpose of this guide, we have assigned vtnet0 to WAN and vtnet1 to LAN.
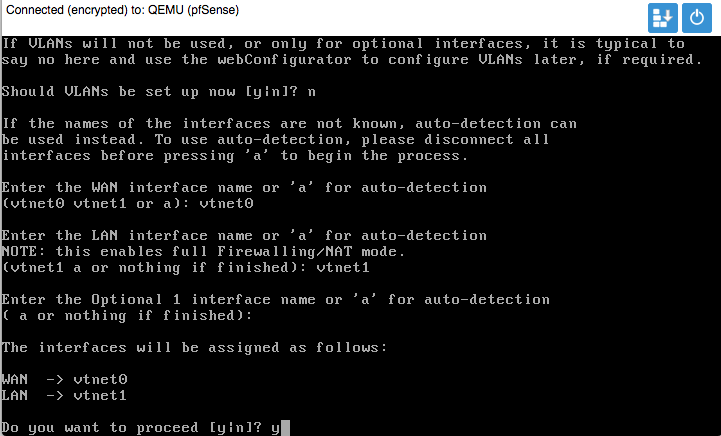
After interfaces have been assigned, the pfSense firewall will complete the boot process.
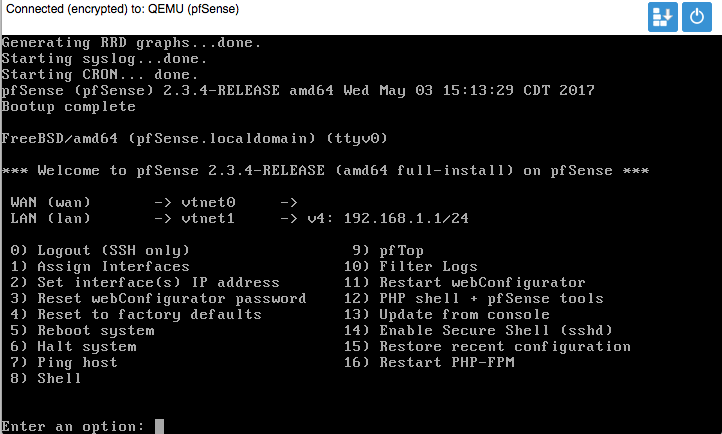
Configuring pfSense Software to work with Proxmox VirtIO
After the pfSense installation and interfaces assignment is complete, connect to the assigned LAN port from another computer.
Warning
Because the hardware checksum offload is not yet disabled, accessing pfSense webGUI might be sluggish. This is NORMAL and is fixed in the following step.
To disable hardware checksum offload, navigate under System > Advanced and select Networking tab. Under Networking Interfaces section check the Disable hardware checksum offload and click save. Reboot will be required after this step.
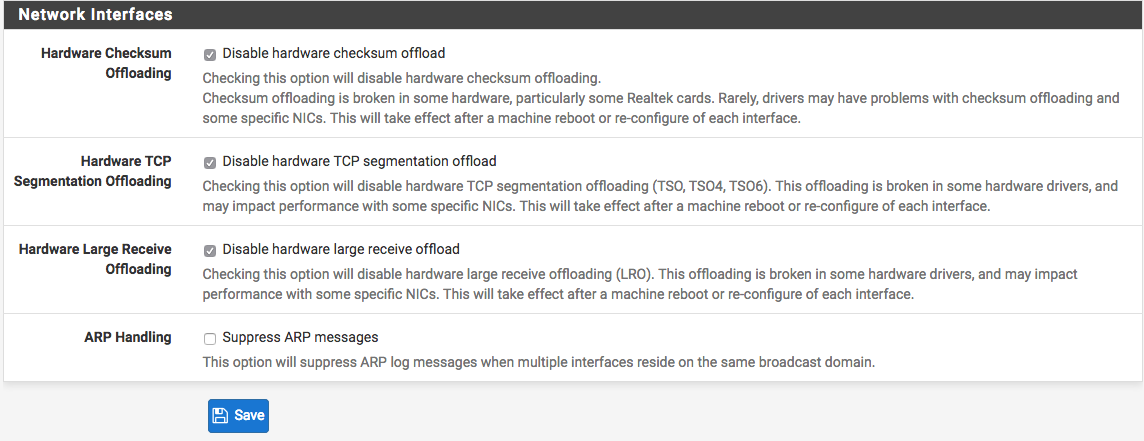
Congratulations, the pfSense virtual machine installation and configuration on Proxmox is now complete.