IPsec for road warriors in PfSense software version 2.0.1 with PSK instead of xauth
This article describes how to set up Mobile IPsec in pfSense® software version 2.x with a Pre-Shared Key instead of xauth and how to configure the Shrew Soft VPN Client to match. The Shrew Soft VPN client is freely available for Windows, Linux and BSD at http://shrew.net.
For information on using xauth and connecting mobile devices like Android phones or iPhones, see IPsec Road Warrior/Mobile Client How-To.
Before we start:
Make sure the LAN is using the pfSense firewall as its default gateway and that it is working properly.
Make sure the client has a functioning Internet connection.
If either condition is not met, the tunnel will not work. In this howto I’ll describe how to get IPsec tunneling working. IPsec, tunneling and VPN mean the same in this article.
A lot of information in this how-to was gained in the pfSense forum. Thanks to the folks on the forum for providing the information.
On the pfSense firewall
Begin by enabling IPsec.
Navigate to VPN > IPsec
Check Enable IPsec
Click Save
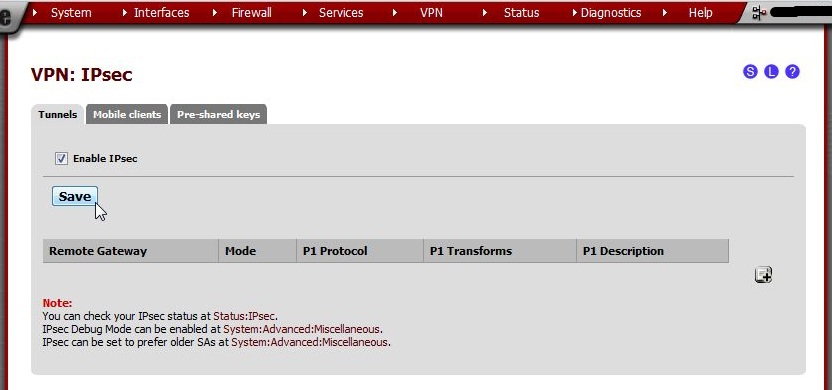
Now, create a phase 1 entry.
Do not click  on this page to create a phase 1 entry. That button
will not go the page needed to create a phase 1 for mobile clients but
will go to a page to create a phase 1 for lan-to-lan-tunneling instead.
Navigate to the Mobile clients tab. Check Enable IPsec Mobile Client Support
Tell the client about available services. The more items entered here, the less clients have to enter manually. Enter the following values.
Key |
Value |
Remark |
|---|---|---|
IKE Extensions |
checked |
|
User Authentication |
system |
|
Group Authentication |
system |
|
Virtual Address Pool |
checked, network: 192.168.79.0/24 |
Enter a network here that is not in use in the LAN and preferably not in any clients’ LAN either. It can be any subnet, but don’t pick a commonly used one (e.g. don’t use 192.168.0.0/24 or 192.168.1.0/24). It will confuse the clients. |
Network List |
checked |
|
Save Xauth Password |
unchecked |
Check if using xauth and the clients should be able to save passwords locally. |
DNS Default Domain |
Check to supply a default DNS domain for hostname resolution by clients |
Optional but if a domain is present (such as Active Directory) clients will be able to resolve servers faster. |
DNS Servers |
Check if clients must get DNS over IPsec |
If Active Directory is used, enter its DNS servers here. If it’s a home network, the IP address of the firewall, Google public DNS, OpenDNS, or any other DNS server reachable via the VPN may be used. |
WINS Servers |
Check if WINS is in use |
Superfluous if also providing DNS but may be needed for some older domain configurations. |
Phase2 PFS Group |
checked, group 2 |
Not necessary to set here, as it may be set in the Phase 2 of the mobile IPsec tunnel settings |
Login Banner |
Optional |
Client software which honors the login banner will present this text to the user upon login. May be needed to display some legal information or any other welcome message. |
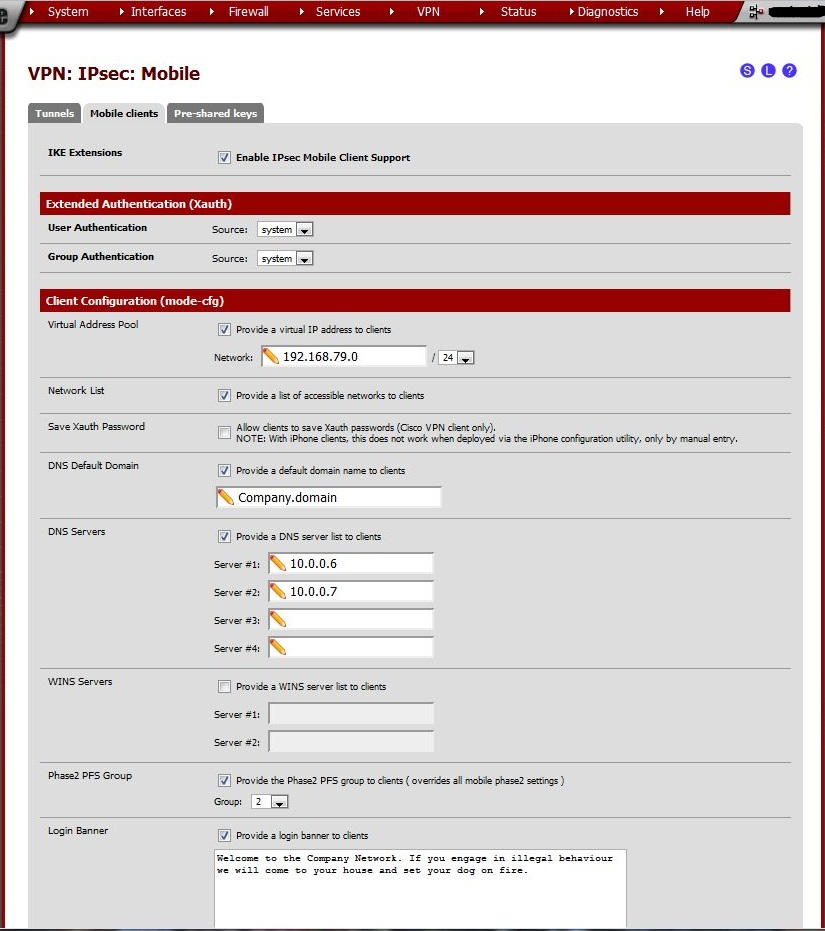
When finished, click Save, then click Apply Changes.
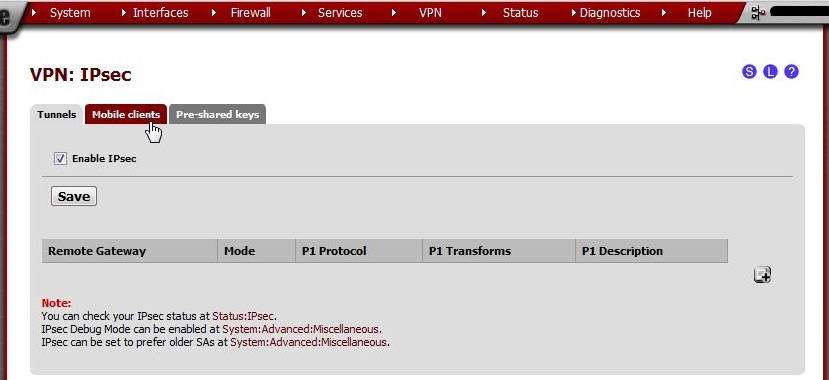
After saving, a warning will appear Support for IPsec Mobile clients is enabled but a Phase1 definition was not found. Please click Create to define one.
Click the Create Phase1 button.

Clicking the button will load the appropriate page to create a Phase 1 for mobile clients.
On the VPN: IPsec: Edit Phase 1: Mobile Client page, enter the following values:
Key |
Value |
Remark |
|---|---|---|
Disabled |
not checked |
|
Interface |
WAN |
|
Description |
Mobile Clients |
This can be anything, name it something appropriate. |
Authentication method |
Mutual PSK |
|
Negotiation mode |
aggressive |
|
My identifier |
My IP address |
|
Policy Generation |
Unique |
Might prevent traffic to the LAN if set to something else. |
Proposal Checking |
Strict |
|
Encryption algorithm |
AES, 256 bits |
Choose any, but keep it identical on router and client. |
Hash algorithm |
SHA1 |
|
DH key group |
2 |
|
Lifetime |
3600 |
|
NAT Traversal |
Force |
Might prevent traffic to the LAN if set to something else. |
Dead Peer Detection |
not checked |
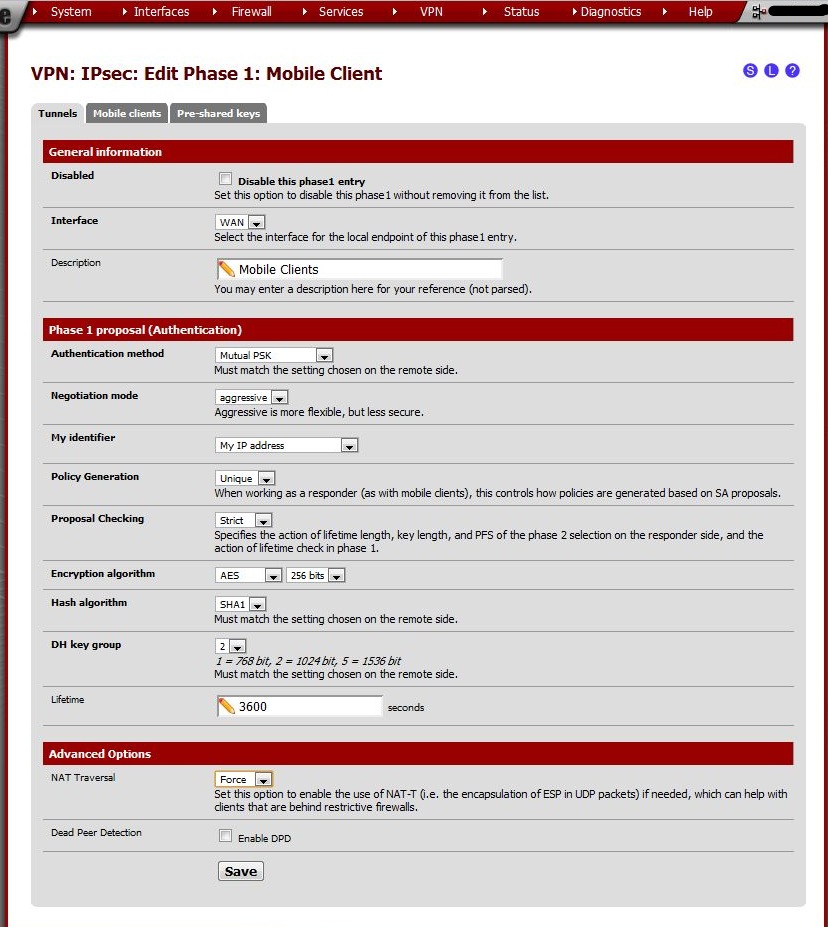
Click Save.
A warning will appear: The IPsec tunnel configuration has been changed. You must apply the changes in order for them to take effect.
Click Apply changes.
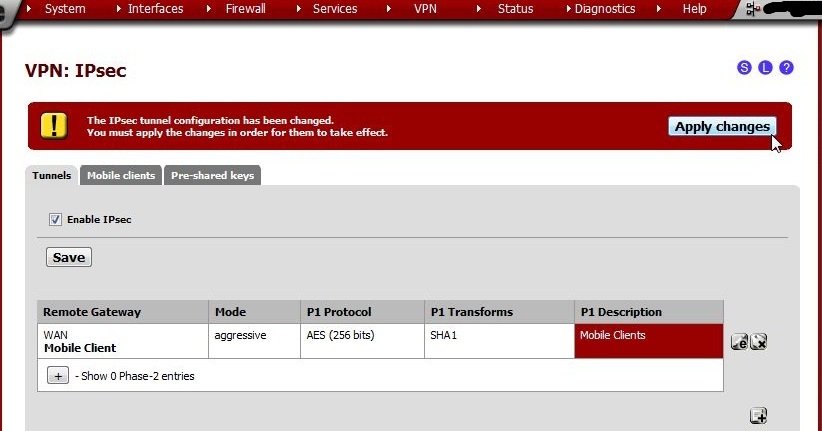
The notice for The changes have been applied successfully. may be ignored. The neurotics among us may click the Close button but that’s optional.
With phase 1 created, we can create a phase 2.
Click  to list the Phase 2 entries under the newly created Phase 1.
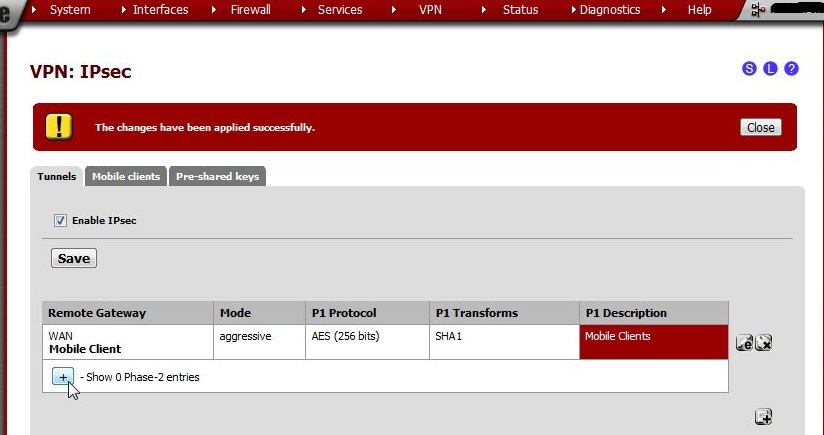
Surprise! There aren’t any. Create one by clicking  in the Phase 2
list.

This will open the VPN: IPsec: Edit Phase 2: Mobile Client page.
On the VPN: IPsec: Edit Phase 2: Mobile Client page, enter these values:
Key |
Value |
Remark |
|---|---|---|
Disabled |
not checked |
|
Mode |
Tunnel |
|
Local Network |
LAN subnet |
|
Description |
Phase 2 for road warriors |
Enter something appropriate. |
Protocol |
ESP |
|
Encryption algorithms |
select only 3DES |
The best is chosen at handshake time. Others will probably work too. 3DES works for me because I have a mobile application that will work only with this. |
Hash algorithms |
Select SHA1 and MD5 |
|
PFS key group |
Set to Group 2 |
|
Lifetime |
3600 |
|
Automatically ping host |
leave empty |
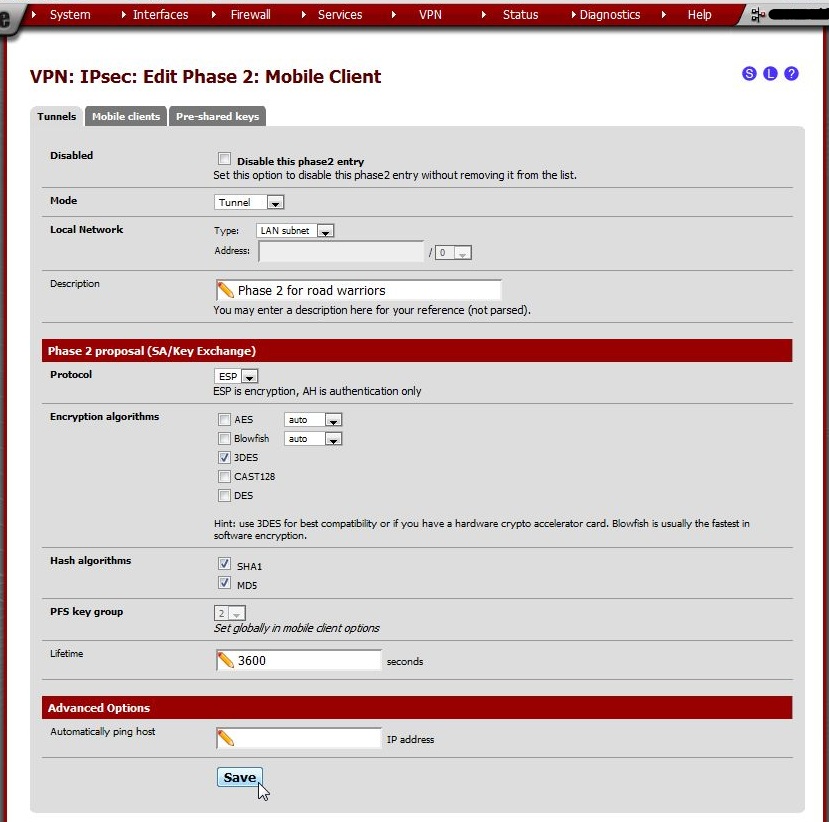
Click Save, then click Apply changes.
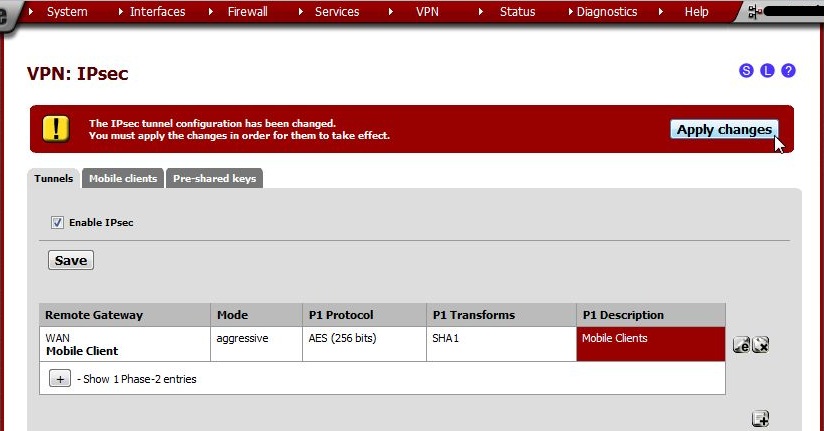
We’re almost done here. We need to create user accounts so someone can actually use the tunnel.
Navigate to VPN > IPsec, Pre-shared keys tab. (Screenshots may look a bit different because in-use keys have been redacted.)
There are different ways to set up pre-shared keys for users. They may also be added in the User Manager but that is beyond the scope of this document.
Click  to create a new Pre-Shared Key.

For identifiers, e-mail addresses are commonly used as they are more unique than first or last names. Any identifier may be used so long as it is unique to the person using the account. We recommend using e-mail address format identifiers. They don’t really need to exist, they are only used for IPsec identification.
Generate a long/random Pre-Shared Key. There are many utilities to generate random data, such as Lastpass, KeyPass, or online sites such as https://www.grc.com/passwords.htm. (Use the string in the middle: 63 random printable ASCII characters). Offline tools are preferred.

Press Save, wait for the page to load, note that the key is now in the list and press Apply changes.
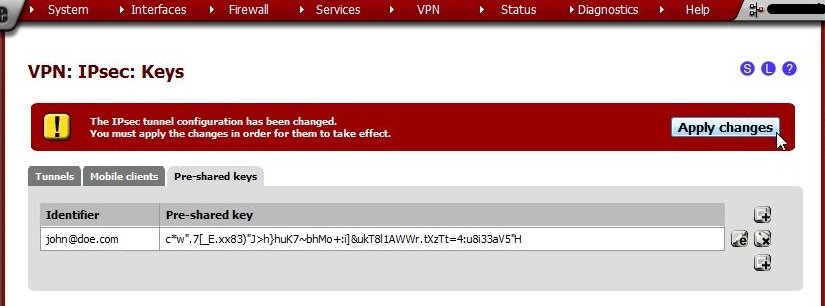
Congratulations, the firewall configuration is complete.
The client
This part is done on the user’s computer. Screenshots were taken in Windows but Shrew Soft VPN is available for Linux and BSD (so probably Mac) too.
Download and install Shrew Soft VPN.
Once finished, open ipseca.exe. The VPN Access Manager window is presented. (Window title bar is missing in the screenshots)

Press the big round Add button to set up a tunnel configuration.
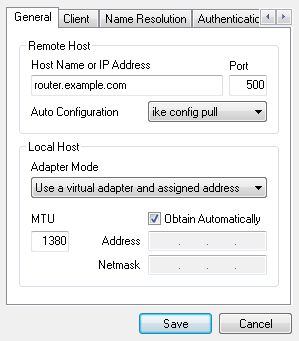
On the General tab, enter the IP address or host name pfSense firewall. Leave the rest as it is. The default values in new versions of the Shrew Soft VPN client may change so in case of doubt, stick to the screenshots.
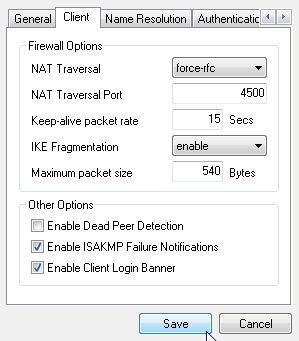
On the Client tab, set NAT Traversal to force-rfc and uncheck Enable Dead Peer Detection. If these settings are wrong, an established tunnel may not let any traffic through.
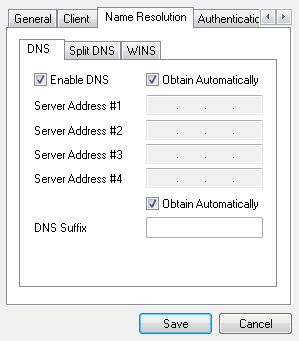
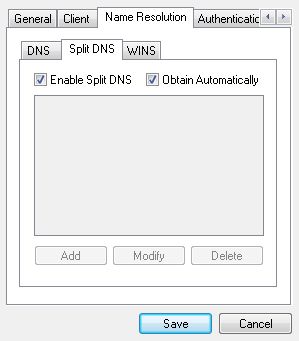
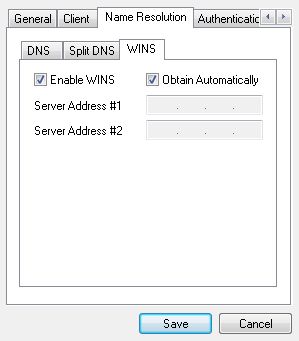
Don’t change anything on the Name Resolution tab; these settings are all automatically set by the pfSense software. Relevant information could be entered here but if the settings were configured on the firewall, they need not be set here.
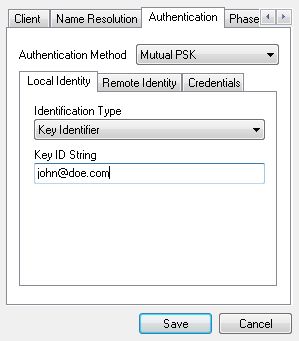
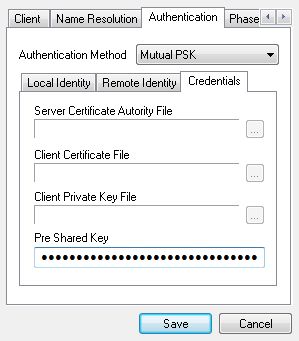
Go to the Authentication tab. Set Authentication Method to Mutual PSK. Under Local Identity, choose Key Identifier as the Identification Type and enter the user’s e-mail address (or whatever was used as an identifier) in the Key ID String field.
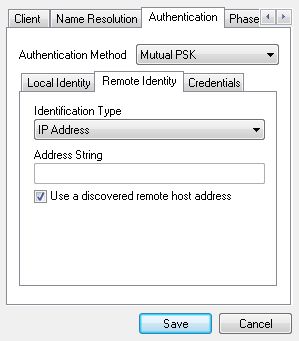
Under Remote Identity, set Identification Type to IP Address and check Use a discovered remote host address.
Finally, under Credentials, enter the Pre Shared Key associated with the e-mail address.
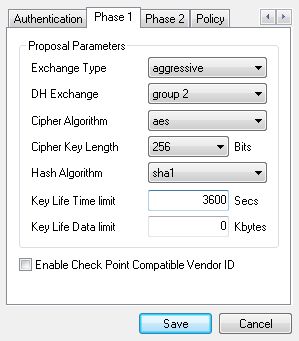
Now scroll over to the Phase 1 tab. Set the Cipher Algorithm to aes or whatever was entered on the Phase 1 page in the pfSense software. Cipher Key Length to 256 (or whatever etc.) and Hash Algorithm to sha1. Set the Key Life Time limit to 3600.
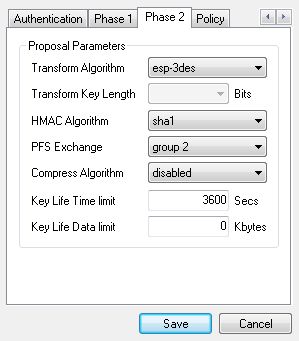
Phase 2 tab: set Transform Algorithm to esp-3des, HMAC Algorithm to sha1 and PFS Exchange to group 2.
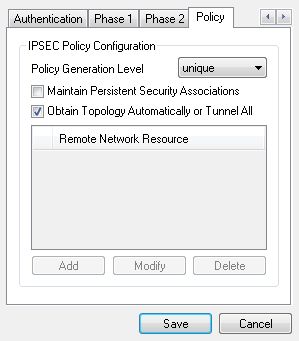
Nearly there! Go to the Policy tab and set Policy Generation Level to unique.
Click Save and give the newly created configuration an appropriate name.
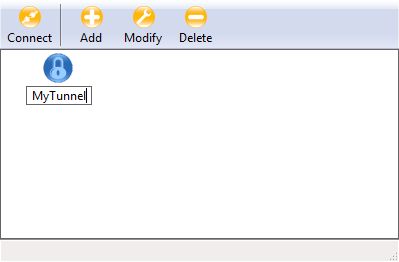
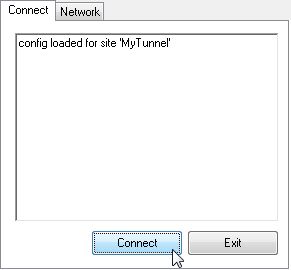
Double-click the configuration and the tunnel window will pop up. Click Connect to start the tunnel.
Click Disconnect to… disconnect the tunnel.
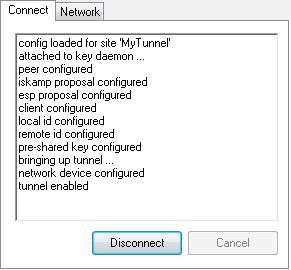
That’s it! A working IPsec tunneling system is now in place.
Client tweaks
Personally I like to tweak it a little bit so the windows hide themselves nicely in the system tray. This is optional but I find it improves the user experience.
In the VPN Access Manager, go to File > Preferences.

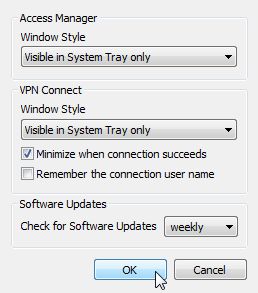
For Access Manager and VPN Connect, set Windows Style to Visible in System Tray only and check Remember when connection succeeds. No need to remember the user name since we’re not using user names but pre-shared keys.
A shortcut may be created directly to the tunnel: create a shortcut to
ipsecc.exe (in c:\program files etc.). Right-click the shortcut and
choose Properties. In the Target field, add -a -r
“MyTunnel”. -a means: start automatically. This starts the connection
without the user having to press the Connect button. -r specifies the
tunnel name. If the tunnel was named “Work”, write “Work” in stead of
“MyTunnel”.
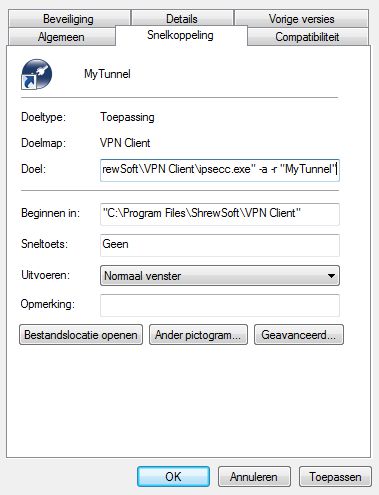
Now when the shortcut is double clicked, the tunnel is automatically started.
Backup the tunnel profile by selecting it in the VPN Access Manager and going to File > Export. Restoring works by choosing Import.
Troubleshooting
I’ve been using pfSense software in combination with Shrew Soft VPN for a long time and in my experience it is a very stable combination. However things can always go wrong. If it doesn’t work, here are some hints to help troubleshoot.
Check the router and the client settings.
Check the router and the client settings again.
In the pfSense webGUI, go to Status > System Logs and there to the IPsec tab. Hit the Clear log button, have the client try and start the connection and click the IPsec tab again to refresh the page. This is usually very inspiring.
Reboot the client machine.
Reboot the pfSense machine. Should not be necessary but if all other attempts fail, it may be tried.
Use a simple pre-shared key so mistake can be eliminated. When done troubleshooting, use the hard key again!
If a user calls and says Shrew Soft VPN wants to know his user name and password, it’s almost always because the user has either no Internet connection or no dns service. Or they are on a guest network and need to open their browser for identification or something.
Roy Blüthgen wrote in to say: I am running a pfSense software version 2.0.2 installation and followed the guide to set up IPsec server/client. Afterwards when testing I was running into this issue: https://redmine.pfSense.org/issues/1351. I tried the pfSense config suggested in note 30 (by Jim) and that fixed my problem: System > Advanced, Miscellaneous tab, IP Security section: disable/uncheck Prefer older IPsec SAs (added this info as note 35 for issue 1351)