Snort IP Address Reputation Preprocessor
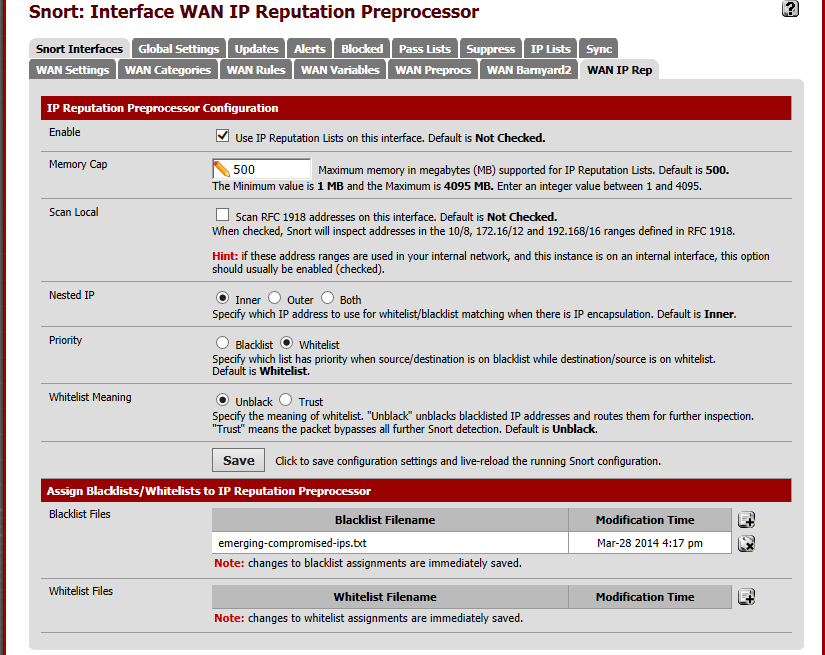
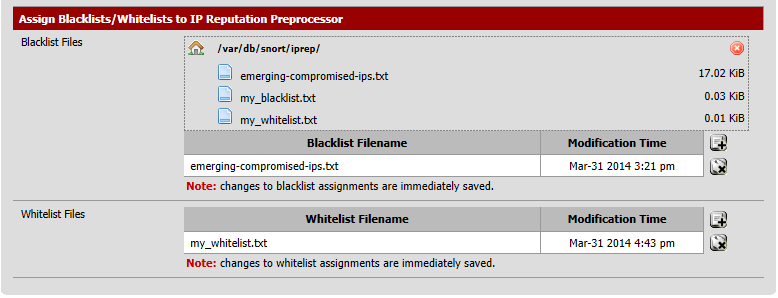
This tab allows configuration of the parameters specific to the IP Reputation preprocessor on the interface. It also allows the assignment of blacklist and whitelist files of IP addresses to the interface.
The available fields are:
Enable: when checked, the IP Reputation preprocessor is active on this Snort instance.
Memory Cap: sets the amount of system memory in megabytes (MB) to reserve for storage of the IP lists associated with this preprocessor. The default is 500 MB and should be sufficient for most installations.
Scan Local: when checked, Snort will include RFC 1918 IP addresses ranges when comparing IP addresses to the blacklists and whitelists. If an RFC 1918 IP addresses is in the whitelist files, or some are blacklist files, then this option should be enabled. The default is disabled.
Nested IP: this tells Snort which IP address to compare to the IP lists in the whitelist and blacklist files when there is IP encapsulation. The default is Inner.
Priority: instructs Snort which IP list has priority when the source and destination IP addresses of a packet are each on separate IP lists. For example, if the source IP address is on a blacklist while the destination IP address is on a whitelist, this option tells Snort whether to block the traffic if blacklist has priority, or pass the traffic if whitelist has priority.
Whitelist Meaning: this tells Snort what action to take with whitelisted IP addresses. The two options are Un-black and Trust. When set to Un-black, a blacklisted IP which is listed in the whitelist is not immediately blocked. Instead it is routed through the Snort detection engine for normal inspection. If it generates no alerts, the traffic is allowed. If the inspection results in a Snort alert for the traffic, it will be blocked.
When set to Trust, any IP address on the whitelist (including any that may also be on a blacklist) is immediately allowed to pass with no further inspection. Caution should be exercised when using the Trust mode of operation to insure the IP addresses on the whitelist are in fact trustworthy.

The  and
and  icons at the bottom of the page
are used to assign or remove blacklist and whitelist files to or from
the interface.
Click the  icon to open a file selection dialog.
Choose an IP list file from the list by clicking on the name.
